Concrete is one of the most popular and versatile building materials. Due to its strength and durability, it is widely used in a wide variety of structures, from simple walls to monolithic buildings. However, a special approach will be required to ensure that the elements in concrete structures are securely connected or various equipment is attached to them.
Anchor bolts play a key role in this process. Their correct installation is the key to long-term stability and safety of fastening. Errors during installation can not only reduce the effectiveness of the anchor, but also lead to serious consequences, up to the collapse of structures.
In this article, we will look at how to properly fasten an anchor bolt to concrete, consider the different types of bolts and how to install them. This practical guide is intended for experienced builders and craftsmen, as well as for those facing this task for the first time.
We hope that after reading the article, you will have no doubts about the correct choice and method of installing anchor bolts, and your work will be done efficiently and safely.
An anchor bolt is a reliable fastening tool used to connect objects to concrete substrates. There are different types of anchor bolts and how to install them. Here are the main ones:
Types of anchor bolts:
- Spacer anchors (mechanical)
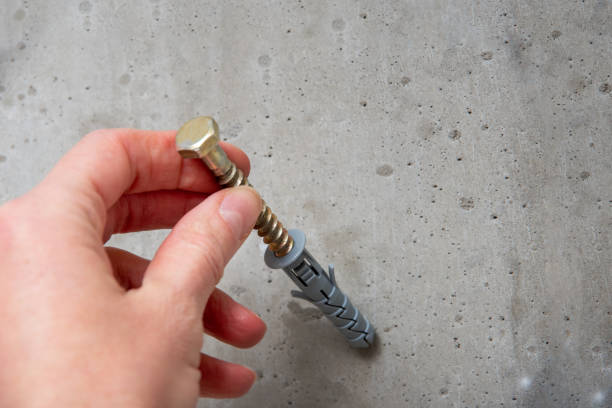
- Classic anchor: consists of a metal body and a bolt. When the bolt is tightened, the end of the body expands to ensure a secure fit.
- Wedge Anchor: Uses a wedge to expand the metal shell inside the concrete when the bolt is tightened.
- Flange anchor: It uses elements that “break” inside the hole when tightened.
- Chemical Anchors
- They are a combination of two-component resin and a steel bolt. The resin hardens, providing a strong bond between the bolt and the concrete. Chemical anchors are often used in fractured concrete or when high bond strength is required.
- Flexible anchors (with hook)
- These anchors are shaped to allow them to “cling” to the back wall of the concrete opening, providing anchoring.
- Cone anchors
- They tend to be conical in shape and expand in the hole when tightened.
- Ceiling anchors
- A specialized type of anchor designed to be attached to ceilings.
- Hammerless anchors
- No exposure is required to install such anchors. This can be especially useful in delicate situations where impacts can damage the material.
- Surface Anchors
- They are installed directly on the surface of the concrete, and not in a pre-drilled hole.
- Screw Anchors
- A special kind of anchor that is simply screwed into concrete, usually without pre-drilling.
- Anchor pins (posts)
- Especially useful for attaching heavy objects to concrete walls or floors. They usually have a thread at one end and a smooth surface at the other.
Each type of anchor bolt is designed for specific conditions and applications. When choosing an anchor, it is important to consider the loads to which it will be subjected, as well as the characteristics of the material in which it will be installed.
Ways to install anchors:
- Hole preparation
- Drilling: Most types of anchor bolts need to drill a hole before installing. The size, depth, and shape of the hole depend on the type of anchor chosen and the loads to which it will be subjected.
- Use a hammer drill or hammer drill to drill into concrete.
- Be sure to follow the manufacturer’s recommendations for the diameter and depth of the hole.
- Cleaning the hole : After drilling, the hole should be thoroughly cleaned of dust, dirt, and debris to ensure maximum mounting strength.
- Use an air pump or compressed air to remove dust.
- For additional cleaning, you can use brushes and special tools.
- Drilling: Most types of anchor bolts need to drill a hole before installing. The size, depth, and shape of the hole depend on the type of anchor chosen and the loads to which it will be subjected.
- Installation of anchors
- Spacer anchors: Insert the anchor into the prepared hole, then tighten the bolt. When tightened, the end of the anchor expands to provide fastening.
- Chemical anchors: First, a chemical resin is injected into the hole using a special gun. After that, a bolt is inserted into the resin. When the resin hardens, it securely fixes the bolt in the concrete.
- Bendable anchors: Simply insert the anchor into the prepared hole so that its shape “clings” to the back wall of the hole.
- Cone anchors: Insert them into the hole and tighten them until they are fully unfolded.
- Screw anchors: Some models may require pre-drilling. The anchor is then simply screwed into the concrete.
- Verification of the installation
- After installing the anchor, it is necessary to check its strength. This can be done by trying to pull it or by applying a weight to it. If the anchor does not move and shows no visible signs of weakness, it is set correctly.
- Completing the Installation
- After inspection, the anchor can be finally tightened (if necessary) to ensure maximum fastening strength.
- Tips
- Use tools that match your anchor bolt.
- Follow the anchor manufacturer’s instructions.
- Consider the characteristics of the material in which you are installing the anchor.
The installation steps may vary slightly depending on the type of anchor and the specific installation conditions, but the steps above represent the overall process.
We delved into the details and features of installing anchor bolts in concrete. The correct choice and installation technique of these elements is crucial for the durability and safety of the entire structure. We hope that the information provided will be useful to professionals and those who are just beginning to get acquainted with this aspect of construction. Do not forget that the quality of the work performed largely depends on attention to detail and a deep understanding of the material. Let your building stand safely and for a long time, and the knowledge gained will help you in the implementation of many construction projects.